Sharpening is a crucial step in photo editing that enhances the perceived sharpness and detail in your images. However, applying it at the wrong stage can lead to undesirable artifacts, noise, or a less natural look. Knowing when to sharpen is just as important as knowing how to sharpen.
Applying sharpening at the optimal time in your workflow ensures maximum effectiveness and avoids common pitfalls. Here’s a breakdown of why timing matters:
1. After Global Adjustments 🎨
- Why: Sharpening should always come after you’ve made all your major global adjustments like exposure, contrast, white balance, and color grading. Changes in these areas can affect the perceived sharpness of an image. For instance, adjusting contrast can make an image appear sharper or softer. If you sharpen before these adjustments, you might find yourself needing to re-sharpen or that the initial sharpening is now too aggressive or insufficient.
- Benefits: Ensures that the sharpening is applied to the final tonal and color values of the image, leading to more accurate and effective results. It prevents the need for repetitive sharpening adjustments.
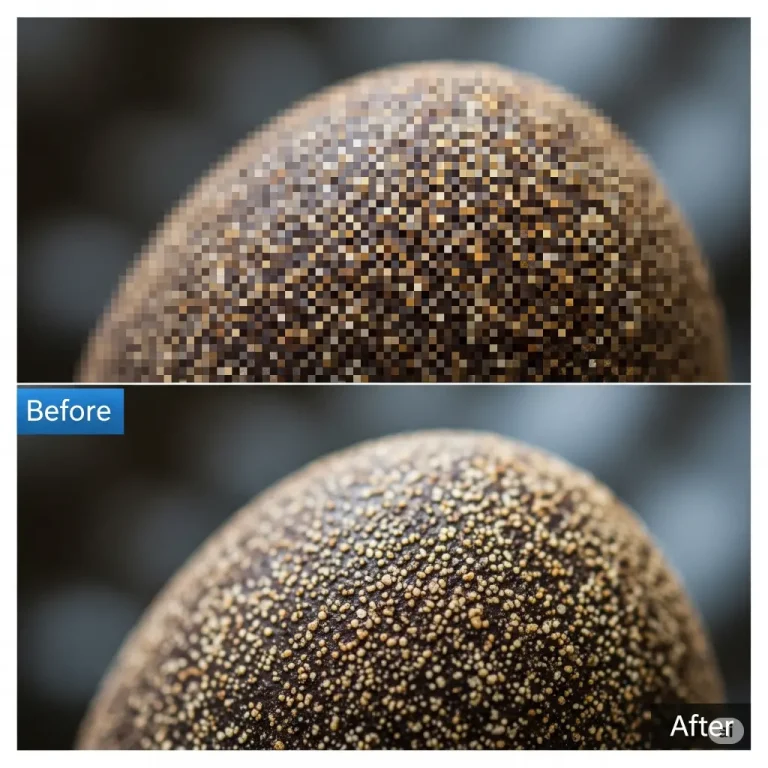
2. After Noise Reduction 🧼
- Why: This is a critical sequence. Noise reduction should always be applied before sharpening. Noise reduction algorithms work by identifying and smoothing out random pixel variations (noise). Sharpening, on the other hand, works by increasing the contrast at edges. If you sharpen an image with noise, you risk accentuating that noise, making it more prominent and unsightly.
- Benefits: By removing noise first, sharpening has a cleaner canvas to work on. This allows you to sharpen effectively without bringing out or exacerbating existing digital noise, resulting in a cleaner, crisper final image.
3. Before Local Adjustments (Sometimes) 🖌️
- Why: This point can be debated and depends on your specific workflow. Generally, global sharpening (applied to the whole image) comes after global adjustments and noise reduction. Some photographers then do their local adjustments (e.g., dodging and burning, specific area enhancements) and might apply additional selective sharpening to particular areas afterwards.
- Benefits: Applying global sharpening early in this phase means your local adjustments are working with an already defined base level of sharpness. If you plan to add selective sharpening later, it’s often more effective after local edits are complete to avoid over-sharpening or creating halos around edited areas.
4. Before Resizing for Final Output 🖼️
- Why: When preparing an image for its final destination (e.g., web, print), you’ll often need to resize it. Sharpening is highly resolution-dependent. An image sharpened for a large print will look over-sharpened and potentially pixelated if simply scaled down for web use without re-sharpening. Conversely, an image sharpened for the web will likely appear soft when printed large.
- Benefits: Applying output sharpening after resizing your image for its specific purpose ensures that the sharpening is perfectly tailored to the final resolution and medium. Most editing software offers specific sharpening algorithms for output (e.g., “Smart Sharpen” in Photoshop with “Remove” options, or specific print/web sharpening presets). This delivers optimal sharpness for the intended display.
5. As One of the Last Steps in Your Workflow 🏁
- Why: Think of sharpening as the final polish. It’s the last significant adjustment you make to the image before saving or exporting your final file. This prevents any subsequent edits from inadvertently softening the image or introducing new issues that might require re-sharpening.
- Benefits: Ensures that the sharpness you meticulously apply remains consistent in your final output, providing the best possible presentation of your image.
Conclusion
The ideal timing for applying sharpening in post-production is a methodical process. Start with your global adjustments, then tackle noise reduction. After these foundational steps, apply your main global sharpening. Only then consider local adjustments and finally, apply specific output sharpening after resizing for its intended use. Following this sequence will help you achieve clean, crisp images that truly stand out, free from distracting artifacts or excessive noise. Mastering this final touch can significantly elevate the quality of your photographs.