ZEISS, a global leader in optics and optoelectronics, has built its enduring reputation on a relentless pursuit of precision. At the heart of this commitment lies metrology – the science of measurement. For ZEISS, metrology is not merely a supplementary step in quality control; it is an intrinsic, pervasive element integrated into every phase of their product lifecycle, from research and development to manufacturing and final inspection. This deep integration ensures that every ZEISS product, whether an ophthalmic lens, a camera lens, a surgical microscope, or a semiconductor manufacturing system, adheres to the most stringent quality standards and delivers unparalleled performance.
Key Dimensions of Metrology in ZEISS Quality Control:
- Design and Development Validation:
- Simulative Metrology: Before physical prototypes are created, ZEISS employs advanced simulation tools that incorporate metrological principles to predict component behavior and system performance. This virtual metrology helps optimize designs for manufacturability and adherence to specifications.
- Prototype Verification: Early prototypes undergo extensive metrological analysis. High-precision 3D scanners, coordinate measuring machines (CMMs), and optical metrology systems are used to verify dimensional accuracy, geometric tolerances, and surface characteristics against design intent. This iterative process refines the design before mass production.
- Precision Manufacturing and In-Process Control:
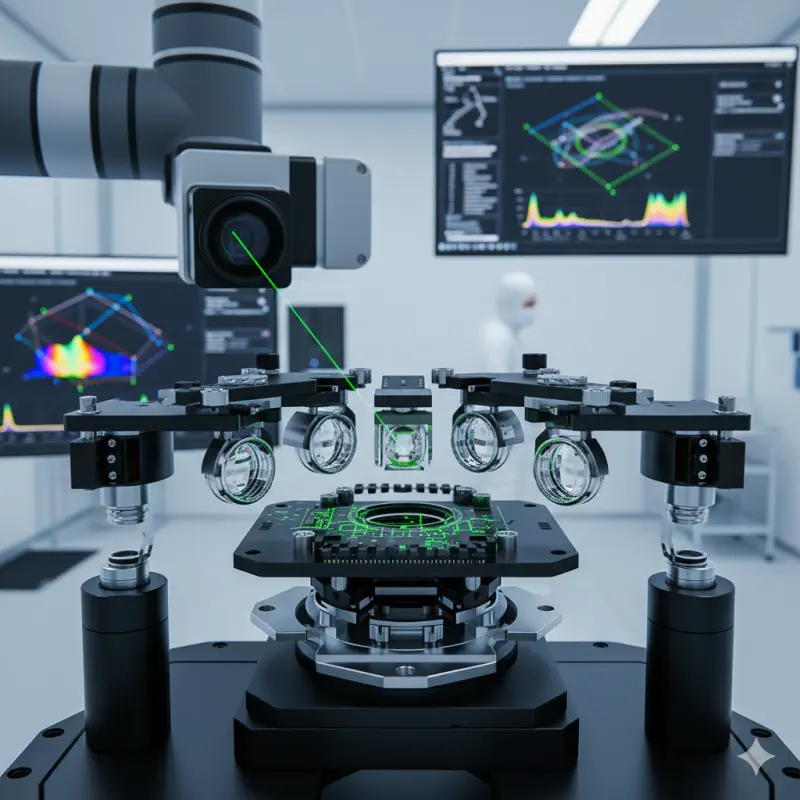
- In-Line Measurement Systems: ZEISS integrates metrology directly into its production lines. Automated optical inspection (AOI) systems, laser scanners, and tactile probes continuously monitor critical dimensions and features of components as they are being manufactured. This real-time feedback loop allows for immediate adjustments, preventing defects and minimizing scrap.
- Advanced CMMs and Multi-Sensor Systems: For complex parts, ZEISS utilizes its own highly accurate Coordinate Measuring Machines (CMMs) equipped with various sensors (tactile, optical, laser). These machines provide sub-micron level measurements of form, position, and orientation, ensuring every component meets exacting specifications.
- Surface Metrology: The quality of optical surfaces is paramount. ZEISS employs interferometry, white light interferometry, and profilometry to precisely measure surface roughness, flatness, and form deviations of lenses, mirrors, and other optical elements, often down to nanometer precision.
- Final Product Inspection and Calibration:
- End-of-Line Verification: Every finished product undergoes a comprehensive final inspection using an array of metrological instruments. This includes functional testing where metrology verifies the product’s performance against its intended application (e.g., MTF testing for lenses, precision positioning for CMMs).
- Calibration and Traceability: ZEISS ensures that all measurement equipment used for quality control is regularly calibrated against international standards. This provides an unbroken chain of traceability, ensuring that measurements are accurate and reliable, and that products meet certified specifications.
- Environmental Metrology: Products designed for sensitive applications (e.g., semiconductor lithography) are often tested in highly controlled environmental chambers where temperature, humidity, and vibration are precisely monitored and controlled using specialized metrological sensors.
- Research, Innovation, and Standard Setting:
- Driving Metrology Innovation: ZEISS is not only a user of metrology but also a leading developer of metrology solutions. Their internal demand for extreme precision fuels their innovation in industrial metrology, resulting in new measurement technologies and systems that benefit industries worldwide.
- Contribution to Standards: Through its extensive experience and R&D, ZEISS actively contributes to the development of international metrology standards, further elevating global benchmarks for precision and quality.
Key Features of ZEISS’s Metrology Integration:
- Unparalleled Accuracy: Measurement systems often operate at sub-micron or nanometer scales.
- Comprehensive Coverage: Metrology applied from concept design to final product validation.
- Automation & Speed: Integration of automated measurement systems for efficiency and consistency.
- Traceability: Robust calibration processes ensure measurement results are reliable and verifiable.
- Internal Expertise: ZEISS’s dual role as a metrology user and developer provides unique insights.
Benefits for ZEISS and its Customers:
- Superior Product Performance: Guaranteed precision leads to higher performance in all ZEISS products.
- Enhanced Reliability & Durability: Meticulous control over component dimensions contributes to robust and long-lasting products.
- Reduced Defects & Waste: In-process metrology identifies issues early, minimizing rework and material waste.
- Faster Innovation Cycles: Accurate measurement data accelerates design iterations and new product development.
- Industry Leadership: ZEISS maintains its competitive edge through a reputation for uncompromising quality.
- Customer Confidence: Users trust ZEISS products for their consistency and documented performance.
Conclusion:
Metrology is the invisible backbone of ZEISS’s quality. It is the language through which design intent is translated into tangible, high-performance products. By continuously pushing the boundaries of measurement science and integrating it holistically, ZEISS not only ensures the exceptional quality of its diverse portfolio but also defines the very standards of precision for numerous industries worldwide. This unwavering dedication to “seeing beyond” through precise measurement is what truly sets ZEISS apart.
| Questions and Answers: | |
| Q: What is the primary function of in-line measurement systems at ZEISS? | A: They provide real-time metrological feedback directly on the production line, allowing for immediate identification and correction of deviations in critical dimensions. This process prevents defects and ensures components meet tight specifications as they are being manufactured. |
| Q: How does ZEISS use its own Coordinate Measuring Machines (CMMs) in quality control? | A: ZEISS CMMs, equipped with multi-sensor systems, are used for the highly accurate measurement of complex parts. They verify the dimensional accuracy, geometric tolerances, form, and position of components down to the sub-micron level before assembly. |
| Q: What specific metrology technique is used to inspect the surface quality of ZEISS lenses? | A: Interferometry and profilometry are key techniques. They measure surface characteristics like roughness, flatness, and form deviations of optical elements, often with nanometer precision, which is critical for optical performance. |
| Q: What is the significance of ‘traceability’ in ZEISS’s metrology and quality control? | A: Traceability ensures that all measurement results used for quality control are calibrated against international standards. This provides an unbroken chain of documentation, verifying the reliability and accuracy of the measurements and confirming products meet certified specifications. |
| Q: How does metrology contribute to ZEISS’s research and development (R&D)? | A: Metrology is vital for design validation and prototype verification. Accurate measurement data accelerates the design iteration process, leading to faster innovation cycles and the development of new, high-performance products. |

